Author Topic: AC Frua Restoration Part 2  (Read 83052 times)

Emmanueld

  • Hero Member
  • *****
  • Posts: 864
    • View Profile
AC Frua Restoration Part 2
« Reply #30 on: March 02, 2011, 14:59:48 »
I will try! I know of a black one, a coupe also, right hand drive, the owner might want to sell it. I have spoken to him a few times. The car is missing the boot lock which was misplaced during restoration. If anybody is interested, I would be happy to provide the owner's email.
   
   Emmanuel

Classicus

  • Hero Member
  • *****
  • Posts: 734
    • View Profile
AC Frua Restoration Part 2
« Reply #31 on: March 02, 2011, 16:52:57 »
Thanks. I'm also pretty sure the black one is CF 70 which was advertised on E-Bay September 21st 2007, I also think the owner must have posted somewhere on here too as I clearly remember him saying he was looking for a boot lock. As for the prices back then....
   
   http://acfrua428.activeboard.com/forum.spark?aBID=115841&topicID=16003430&p=3


Emmanueld

  • Hero Member
  • *****
  • Posts: 864
    • View Profile
AC Frua Restoration Part 2
« Reply #32 on: March 02, 2011, 23:19:11 »
He sent me photos of the interior, because someone I knew was interested in buying it. The problem is its a right hand drive.


   Emmanuel

Emmanueld

  • Hero Member
  • *****
  • Posts: 864
    • View Profile
AC Frua Restoration Part 2
« Reply #33 on: March 03, 2011, 17:42:13 »
Here are some more photos:
   
   Inner fender being worked on, still needs to be trimmed'


Emmanueld

  • Hero Member
  • *****
  • Posts: 864
    • View Profile
AC Frua Restoration Part 2
« Reply #34 on: March 03, 2011, 17:46:15 »
Inside the boot:


   The wing lip being fitted, we copied the curvature on the other side, I hope its right! Having seen quite a few other cars, I am reasonably confident. at the very list, it will be symmetrical, unlike from the factory. Every car I have seen, the wheel clearance on the left is greater by 1/2 inch than on the right. Mine was 3/4 inch. [:D]


   Emmanuel

lyonheart84

  • Full Member
  • ***
  • Posts: 103
    • View Profile
AC Frua Restoration Part 2
« Reply #35 on: March 04, 2011, 18:39:25 »
If we could find a way to ship my new left hand wing ( fastback )to Jeff you would have been able to compare the wheel arch lip on that !

J Jones

  • Full Member
  • ***
  • Posts: 177
    • View Profile
AC Frua Restoration Part 2
« Reply #36 on: March 04, 2011, 19:57:18 »
The guys measured the wheel clearance on both sides of my car, and there was a difference of under 3/16ths of an inch. Made me pretty happy. Confidence-building affirmation. The more difficult issue was getting the wheel arch profile correct, and that would have been made much easlier by having the wing.
   
   Hopefully, we will be able to do a 3D scan, and then the correct shape and profile will be available to everyone.
   
   (It is my opinion that having more and better cars on the road, the better it will be for the reputation of the cars, with a resulting rise and stability in values)
   
   If Martin Button gets back to me (he's out of reach until March 8), I'm sure we'll be able to work out the shipping issue. How hard could this be? As you pointed out, Brett, theres a huge amout of material being shipped safely every day.

Emmanueld

  • Hero Member
  • *****
  • Posts: 864
    • View Profile
AC Frua Restoration Part 2
« Reply #37 on: March 05, 2011, 03:19:38 »
Jeffrey, your car is probably one of the best, unmolested original 428 around. The templates we made from the right side of my car's wheel wells match all of yours which means it has probably never been in an accident. Even the beautiful blue convertible that I downloaded pictures of on the Internet, supposedly restored in Italy has the rear wheel wells wrong. Completely round, being a roadster, It probably had massive amount of rust at one point and if both sides were rotten,  the restorer probably had to guess as to what the proper shape should have been.
   
   Emmanuel

Emmanueld

  • Hero Member
  • *****
  • Posts: 864
    • View Profile
AC Frua Restoration Part 2
« Reply #38 on: March 05, 2011, 03:28:29 »
Now we will tackle the front left wing which was badly repaired at some point. The shape at the front is all wrong and needs to be corrected.  The good thing about all of this is that we removed 20 to 30 pounds of lead!
   
   Emmanuel [:)]

Emmanueld

  • Hero Member
  • *****
  • Posts: 864
    • View Profile
AC Frua Restoration Part 2
« Reply #39 on: March 08, 2011, 05:56:38 »
Here are 2 more photos of the car at the metalsmiths.
   
   The picture below shows the car on its right side, there is an old repair right in front of the door behind the vent. It is a small patch filled with brass which needs to be removed and redone properly. Its the area which looks uneven, adjacent to the door.


   Here is the front of the car, the last thing which will be done is the reworking of the left front fender lip to make it match the other side, it also has tons of lead. After that, the car is going to go to painting. All the small dents have been removed, and it should require only a minimum of filler. There is an advantage in living in Southern California where you can leave an unpainted steel car bare and not have to worry about rust. I think she is already a beauty here bare metal and rust free.


   Emmanuel [:)]

Emmanueld

  • Hero Member
  • *****
  • Posts: 864
    • View Profile
AC Frua Restoration Part 2
« Reply #40 on: March 09, 2011, 04:10:44 »
Alright, here we go again, the weird looking anomaly between the side vent and the door on the right is actually two horrible patches due probably to poor corrosion repair:


   I would have left them, but the problem is that they don't wrap around the door sill and moisture will get in there and rot the panel. Again the welder put the patches on top of the panel instead of butt welding them, this resulted in a slight bulging! A whole new piece will be made and butt welded to existing metal, also it will be wrapped around the door edge as it is supposed to.
   
   Mechanically, it was kind of the same thing, suspensions were assembled incorrectly, missing some washers, all ball joints and bushings had to be replaced, I don't think there is one area in this car that has not been serviced with the exception of the calipers which will be rebuilt when the car goes back together.
   
   Emmanuel [:)]

Emmanueld

  • Hero Member
  • *****
  • Posts: 864
    • View Profile
AC Frua Restoration Part 2
« Reply #41 on: March 09, 2011, 04:23:00 »
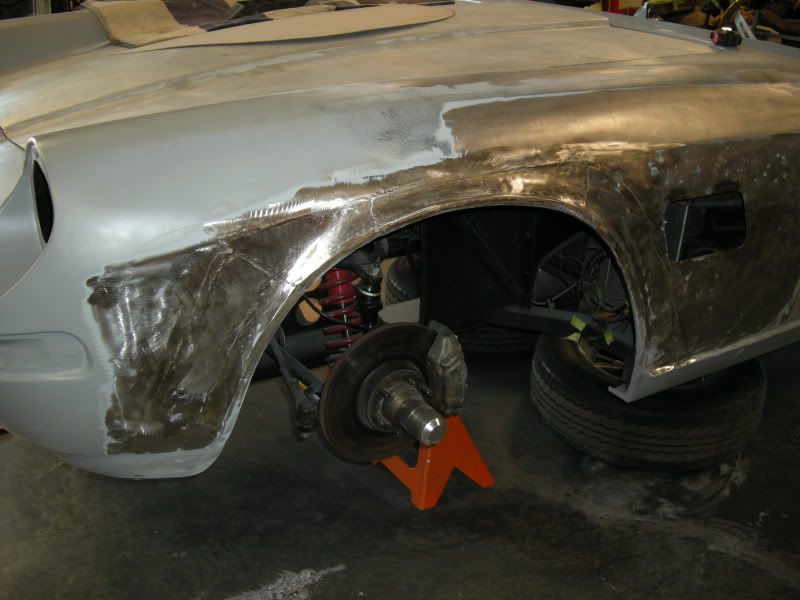
And now the icing on the cake! The front left wing lip. Remember I said it was the wrong shape! Under about 10-15 pounds of lead, filler and paint. Notice the front and rear wings, completely rounded when they should be square at the top. Today, I would spot it immediately, but at the time, not having owned a Frua before, it looked fine to me. I knew both sides were not exactly the same, but the paint was shiny and it looked OK.


   Well here it is:


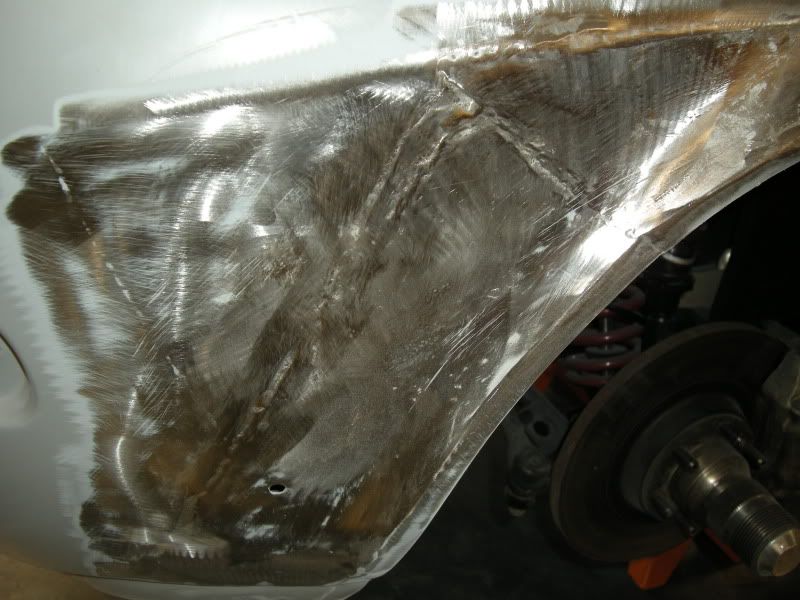
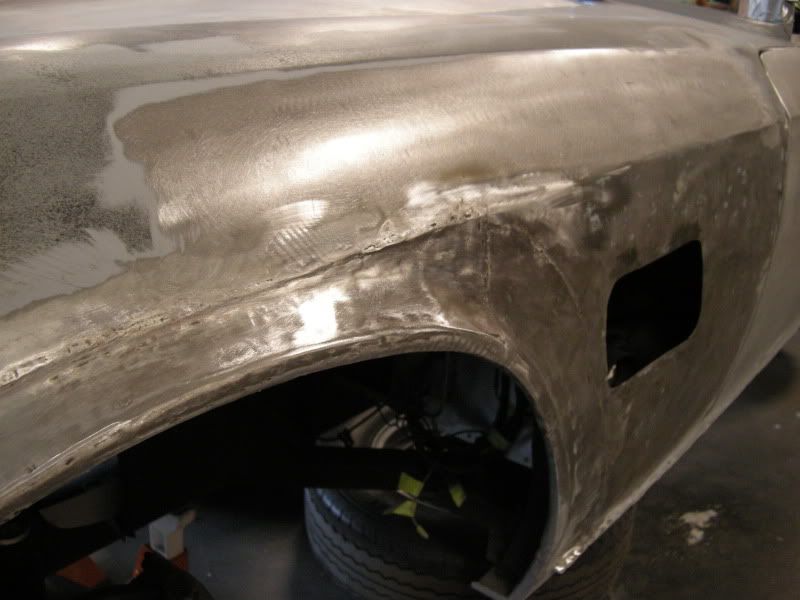
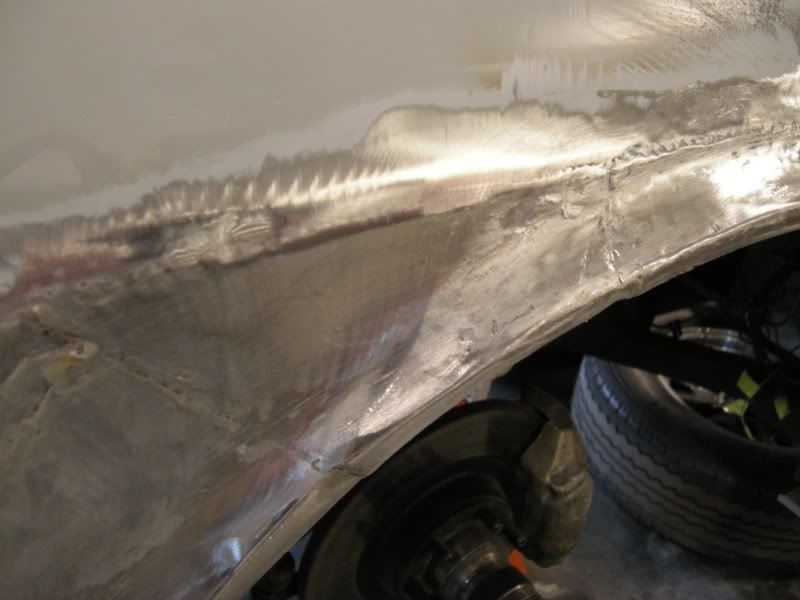
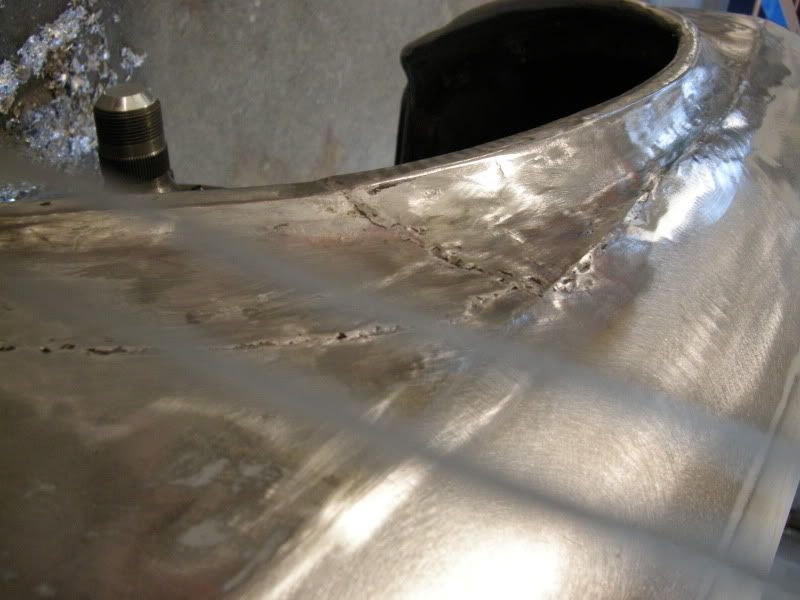
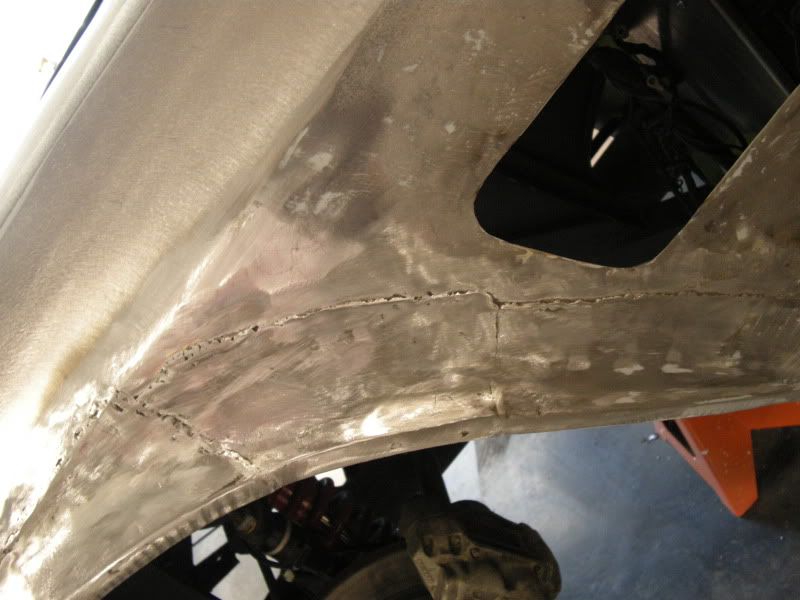
   All 6 pieces of it! Definitely corrosion! Truly Amazing what you can hide! The welder did not even try to grind the welds, he just put a huge amount of lead above them! The amazing thing, is that until the lead started melting and falling on the floor, we had no idea how bad it was. It should not be too difficult to fix since there is no inner wing to worry about. All these patches are welded on top of each other.
   
   Since the car started in Belgium, then went to Switzerland to end up in England, what happened to old world craftsmanship? The worst thing is, who ever worked on it, went through a lot of headache and probably through a lot of labor to do such a poor job and doing it properly would not have resulted in that much more labor.
   
   I think who ever did it did not have the necessary skills to do it right in the first place. This is why one always takes a chance buying a vintage automobile without documented history throughout. Buyer be aware!
   
   Emmanuel [:)]

Emmanueld

  • Hero Member
  • *****
  • Posts: 864
    • View Profile
AC Frua Restoration Part 2
« Reply #42 on: March 10, 2011, 02:16:26 »
Here is a link, to the dealership where I bought CFX54. He had received the car from Northern Cal. the day before and did not know it's condition either. It looked good! I think most people would have fallen for it unless they knew 428s inside out. Now I would be way more careful and would not fall for it. However, I did not pay asking price and this makes me feel better!
   
   http://www.chronomaddox.com/motorin/frua/CFX54/Page.html
   
   Emmanuel [8D]

Emmanueld

  • Hero Member
  • *****
  • Posts: 864
    • View Profile
AC Frua Restoration Part 2
« Reply #43 on: March 10, 2011, 05:22:53 »
Hi Guys, here are more photos:
   
   Old door skins:


   These were the old skins removed from the car. The tops were actually quite corroded!
   
   Emmanuel

Emmanueld

  • Hero Member
  • *****
  • Posts: 864
    • View Profile
AC Frua Restoration Part 2
« Reply #44 on: March 10, 2011, 05:25:43 »
The rear left fender finished:


   As you can see, no need for lead, just a thick coat of primer should be enough!
   It' an exact copy of the other side, right or wrong.
   
   Emmanuel [:)]