Author Topic: AC Frua Restoration Part 2  (Read 83839 times)

Emmanueld

  • Hero Member
  • *****
  • Posts: 864
    • View Profile
AC Frua Restoration Part 2
« Reply #105 on: May 19, 2011, 19:10:56 »
Some more pictures of the car!
   
   The upper part of the wing fixed:


   Again, there is no access from behind, it will require some filler but way better than the factory!
   
   Bottom rear of the wings which were full of lead from a previous repair.


   The line you see is because the patch was not completely welded yet.
   There was about 3 pounds of lead at the bottom there. Amazing.
   
   We are now working on the side vents which need a lot of help. The bezels are made out of brass and had to be de-chromed prior to being straightened and polished.
   
   While working on the left side vent, I decided to also replace the panel between the wing lip and the door which had been pounded and shrank too many times. It would have required too much filler to get a nice finish:


   Here are some more photos of the car with the side vents fitted. The bezels have been de-chromed for straightening. They will go back to the chrome shop where they will apply several coats of copper be polished again and finally chromed. You can see how good the car looks, I am happy!


   Tomorrow or Monday the car will go back to the other shop for priming.
   
   Emmanuel [:D]

Emmanueld

  • Hero Member
  • *****
  • Posts: 864
    • View Profile
AC Frua Restoration Part 2
« Reply #106 on: May 21, 2011, 17:42:09 »
I found some pictures of my lead queen at Concorso Italiano in Pebble Beach a couple of years before I bought it! I still have the certificate. It look pretty good on the outside, but underneath!!!!!!!


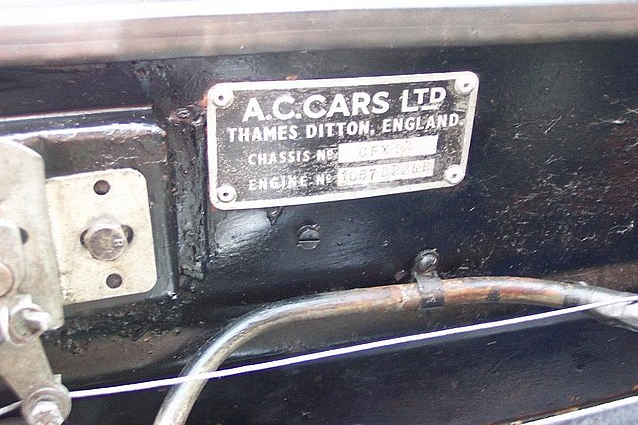
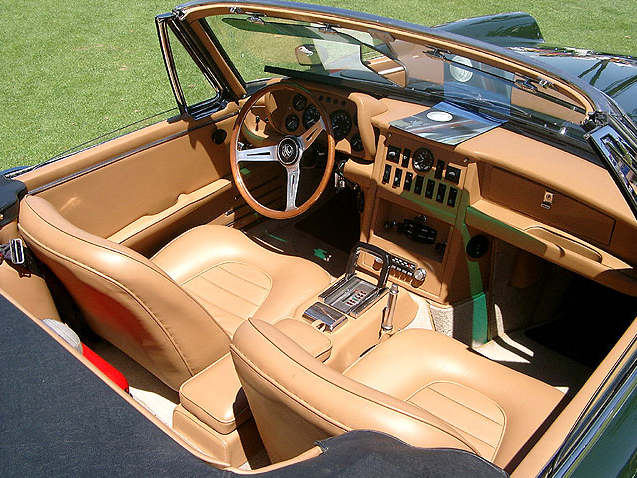
   From the way it looked, (This is also the way it looked when I bought it) one could never tell how bad it was underneath, and how much lead was on the car. If I count how much we took out from the sills, I say we probably come close to 200 Lbs. The sills were full of it to hide the horrible bodywork. Of course most of the rust was left under all this. The paint, although still ok, showed a lot of waves, or overfill which I attributed at the time to having been painted repeatedly without being stripped all the way to bear metal.  I have learned a lot since that time! Notice how skinny and slopping the wing lips are, there is over a 1/2 inch of lead around them, and yet it does not look that bad! Sometimes, I wonder if it was all worth it to do that much work, but considering how rare and gorgeous 428 are, and how they drive when properly set up I say it was. Also, I attributed the ill fitting bumpers as to them being bent, when it was the other way around, the car was too fat and that made the bumpers seem wrong. Somebody should invent an portable instrument, probably X-ray based which would detect the amount of filler and type, lead, Bondo, etc and which would clearly show what the bodywork looks like underneath. There is already such device used on aircraft to detect cracks but it's huge and very expensive.


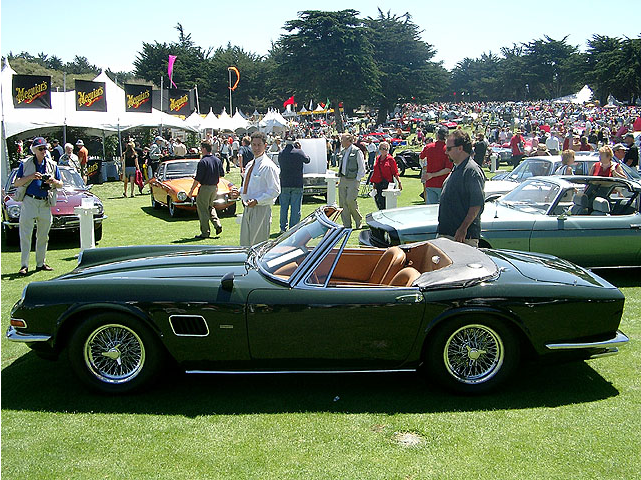
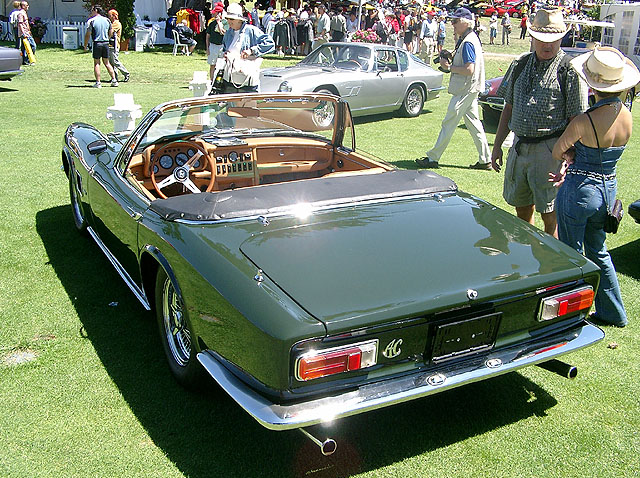
   Actually, here you can see how wavy the car is on the left side. Look at the reflection of the grass, it's all distorted.
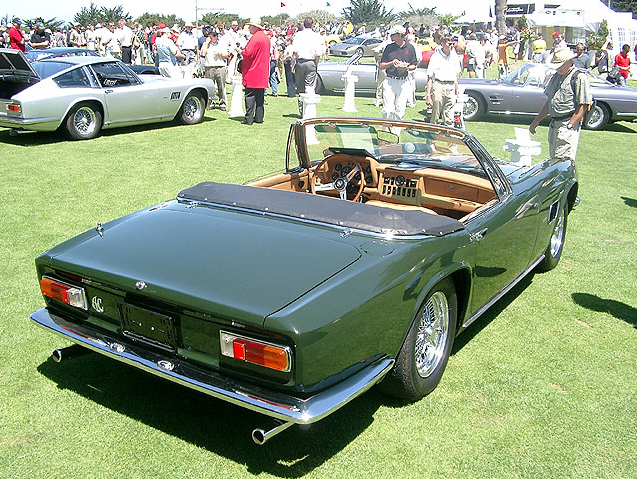


   And the boot:


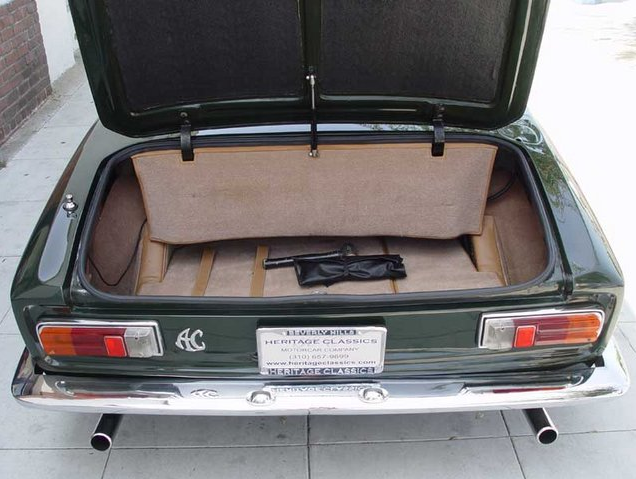
   Can anyone tell me if the boot is supposed to look like this or if it is supposed to be paneled? It may depend whether the car is an early or late model!
   
   Emmanuel [:)]

Emmanueld

  • Hero Member
  • *****
  • Posts: 864
    • View Profile
AC Frua Restoration Part 2
« Reply #107 on: May 21, 2011, 23:04:04 »
quote:
Originally posted by nikbj68
   
Hey Manny, I hope you`re getting a discount from the Hot Rodders for all this lead you`re giving them!
   Must be enough for a `51 Mercury 'Lead Sled' by now?!


   I gave them a superb deal on the lead!
   
   Emmanuel [:D]

Emmanueld

  • Hero Member
  • *****
  • Posts: 864
    • View Profile
AC Frua Restoration Part 2
« Reply #108 on: May 25, 2011, 06:03:55 »
Ok here is a another recap:
   
   First, after we stripped the car, you can see clearly the amount of lead on the edge of that wing:


   We put a coat of primer to protect the metal and also to see all the flaws. However, there was one drawback, it was more difficult to see the lead:


   However, all the lead in the nose had been removed to see the extend of the problem!


   And finally, the car as it was this morning and almost no lead left!


   It should be relatively easy to get a very nice and smooth finish since the car is so straight now. Also, I can tell it's a lot lighter, it sits much higher than before! We have changed over 50% of the car's body panels. There were also a few little patches I have not mentioned like one above the gas tank between the boot lid and the convertible top opening.
   
   Emmanuel [:)]

nikbj68

  • Hero Member
  • *****
  • Posts: 2177
    • View Profile
AC Frua Restoration Part 2
« Reply #109 on: May 27, 2011, 01:40:14 »
quote:
Originally posted by Emmanueld...I can tell it's a lot lighter, it sits much higher than before!...Emmanuel [:)]
I don`t suppose that`s because it`s still missing the interior, brightwork, glass and that big ol` 8-pot boat anchor ?[:p][:D]
   Maybe someone could take all your off-cuts & turn a Cobra back into a Frua!!!

Emmanueld

  • Hero Member
  • *****
  • Posts: 864
    • View Profile
AC Frua Restoration Part 2
« Reply #110 on: May 27, 2011, 01:56:47 »
quote:
Originally posted by nikbj68
   
quote:
Originally posted by Emmanueld...I can tell it's a lot lighter, it sits much higher than before!...Emmanuel [:)]
I don`t suppose that`s because it`s still missing the interior, brightwork, glass and that big ol` 8-pot boat anchor ?[:p][:D]
   Maybe someone could take all your off-cuts & turn a Cobra back into a Frua!!!


   No, I am talking about the car in the same state of assembly of course! If you are interested, I will do a deal on the parts and a very good deal on the lead! [:D]
   
   E

Gus Meyjes

  • Hero Member
  • *****
  • Posts: 729
    • View Profile
AC Frua Restoration Part 2
« Reply #111 on: June 11, 2011, 17:36:11 »
Emmanuel,
   
   I've been looking at your pictures and your chronicling the restoration. It's a great project and it looks like the car will be fantastic. Congratulations on a beautiful project. It looks great.
   
   Gus

Emmanueld

  • Hero Member
  • *****
  • Posts: 864
    • View Profile
AC Frua Restoration Part 2
« Reply #112 on: June 22, 2011, 00:54:00 »
Thanks Gus, I will post more photos soon.
   
   Emmanuel

Emmanueld

  • Hero Member
  • *****
  • Posts: 864
    • View Profile
AC Frua Restoration Part 2
« Reply #113 on: June 24, 2011, 00:52:47 »
Hi Guys, earlier today Jeffrey and I went to pick up his rear wing and I am ecstatic, The work we did on the rear wings of my car look exactly the same as this new old stock wing. Everything looks identical, even the cuts are in pretty much the same places. Awesome, this made my day!
   
   Emmanuel [:D]

Emmanueld

  • Hero Member
  • *****
  • Posts: 864
    • View Profile
AC Frua Restoration Part 2
« Reply #114 on: June 30, 2011, 06:30:03 »
Hi guys, I have some more photos, the bodywork has started and the first skimming is done with a product which is called "All-Metal".
   It is a filler which has aluminum oxide, it has similar properties as lead but is much lighter and a lot harder, it is also completely impervious to moisture unlike old "Bondo"


   The doors


   In most areas, the skimming is only 1/16th thick except behind the doors where the panels could not be beat due to lack of clearance, there the fill is 1/8th. We are also leaving the stamping or spot weld marks on the inside of the doors frames which are also there on CFX37
   
   
   Emmanuel [:)]

Emmanueld

  • Hero Member
  • *****
  • Posts: 864
    • View Profile
AC Frua Restoration Part 2
« Reply #115 on: August 24, 2011, 04:43:09 »
Hi Guys, I have a few more photos taken at the body shop. This is a long process, smoothing the body to get a perfect surface before painting!
   What we started with was already pretty good, but there is always room to make it better.


   This is the part you don't want to rush, the final finish depends on how good the prep work is!
   The hood, finished:


   More to come!I think it will turn out pretty good!
   
   Emmanuel[:)]

Chafford

  • Hero Member
  • *****
  • Posts: 605
    • View Profile
AC Frua Restoration Part 2
« Reply #116 on: August 24, 2011, 13:00:20 »
Can't wait to see the final restoration.

cliffordl

  • Full Member
  • ***
  • Posts: 214
    • View Profile
AC Frua Restoration Part 2
« Reply #117 on: August 24, 2011, 19:19:35 »
Emanuel your boot is exactly as mine is but for the fact at yours is now plush leather trimmed carpet whilst mine is the original black vinyl trimmed corded thin black carpet. Same flap hanging to cover the tank, same two panels for spare and battery and same wells to each side.
   Cliff

Emmanueld

  • Hero Member
  • *****
  • Posts: 864
    • View Profile
AC Frua Restoration Part 2
« Reply #118 on: August 28, 2011, 16:02:55 »
Cliff, thanks for the feedback on the boot. I guess we have established than AC simplified the boot layout on the series 2 by eliminating the side and back panels in the boot. Both Jeffrey's car and CF37 which are series 1 cars have side panels and another panel covering the tail light wiring. On the coupe, it also covers the fuel tanks equalizing pipe. CF37 also has that black corded carpet.
   
   Emmanuel[:)]

Emmanueld

  • Hero Member
  • *****
  • Posts: 864
    • View Profile
AC Frua Restoration Part 2
« Reply #119 on: September 08, 2011, 02:02:47 »
Couple more photos!


   Hood opening! The hood hinges are not serviceable and new one are being made.
   
   Emmanuel[:)]