Hi Bob. The starting point was to modify the hood framework. I don't know if they are all like this, but my car had vertical hoops, so the first job was to bend the sides to mirror the angle of the side screens. Why they weren't already like that I have no idea. Anyhow, that's easy, can be done by hand and naturally the horizontals were bent back to compensate. Consequently a piece needed to come out from the centres, surprisingly about 5" . They're asymmetric now, but makes no functional difference. As soon as you fit it, everything starts to look better, but it was clearly too high, so around 3" was cut out of the two verticals (below the rear hoop pivot point) plus the spigots drilled and repined. I kept telling myself that fortune follows the brave.....mostly.
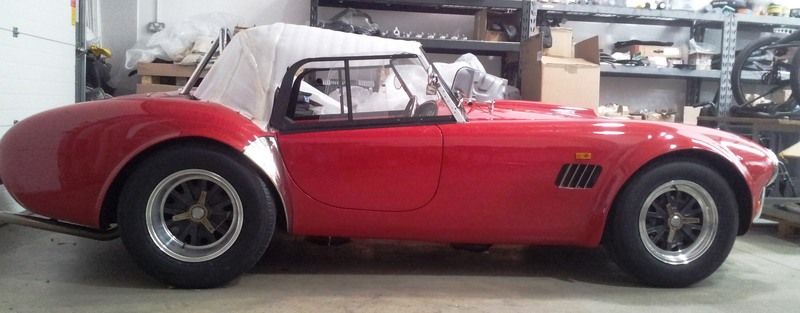
After that the hood itself was mocked up out of 2mm thick white packaging foam, taped together. This was simply to get the aesthetic correct and crucially test if one could still access and be comfortable inside the cockpit. I'm 6' and it’s nowhere near my head, although I have remade the seats to get more under thigh support and they are 2" lower.
I called in a local trimmer in and he very much liked the solution. He could see it being applicable to many other cars. The car was delivered to him and he used the old windscreen bows and other fittings to save costs, but it was not cost effective to use the old hood. He made the new one in just a day or so and it was not very expensive at all. We used the existing Tenax body fittings. I was expecting problems and rework, but it looked great first time.
So now I was committed to somehow making a rear screen. First I made a cardboard template, then transferred that to a piece of acrylic and cut it to suit. I had an industrial bandsaw, but a jigsaw would do. Its important size wise to get make sure you can get it in the boot and you need to consider that from the off. The screen is the longest job.

Making that fit took three attempts, mainly because I didn't use UV stabilised Acrylic. The Acrylic can be formed with a hot air gun, but you must remove the self adhesive protective paper or it will never come off. I marked it out and allowed it to drape form over an oil drum. Some clips and U channel rubber trim later, the job was completed in one long and nerve wracking day.
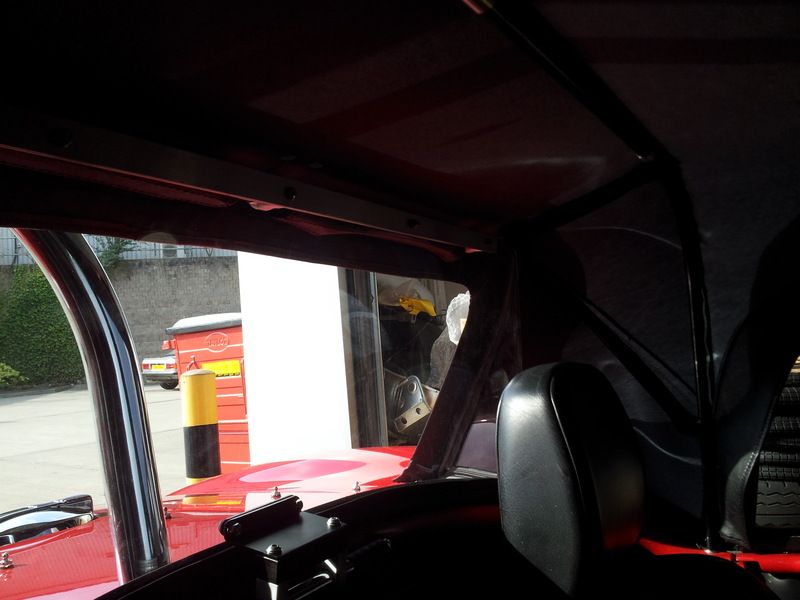
You can see in this pic, the lower bracket that clips onto the central seat belt bar for added security. What you can't see is the Velcro roll attaching the rear of the hood to the rearmost hoop, to add tension.
A bonus is the vastly increased and crystal clear visibility, mainly from the clarity of rigid Acrylic, but also because so much of the hood material is no longer present.


